Shortcode Cleaner
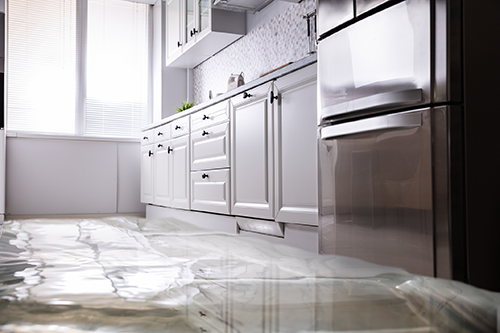
Have you ever wondered what civilization was like before modern day appliances were a part of our day-to-day lives? Prior to the invention of the refrigerator, people preserved food by taking advantage of natural resources around them. Depending on the climate, people would store food in cold lakes and rivers, underground storage pits filled with snow and even hand-made ice houses. We can thank Fred W. Wolf for the ease and convenience of food storage over the past 100 years, since he invented the first home electric refrigerator in 1913. Like anything else, history shows massive innovation that has led to our modern-day refrigerator with advanced features including water filters and automatic ice makers. Modern convenience can quickly become inconvenient when it leads to a water leak for which a homeowner may not prepare for or even consider. Proper refrigerator installment configuration is essential to prevent future leaks and/or electrical problems in your kitchen.
As you walk into your kitchen and see a pool of water on the floor, you begin to panic. Refrigerator water leaks have varying causes. The water filter may be the source of the leak if the connection to the filter has become loose, an incorrect filter size was installed, or the filter is cracked and needs replacement. Another cause of refrigerator leaks can be a blockage in the defrost drain, which collects condensation from the freezer’s refrigeration lines. If the drain is clogged, water will back up and eventually leak into your kitchen. Moreover, cracking of the refrigerator drain pan can cause water leakage – be aware of this as a small leak may go unnoticed for years. Lastly, built-in ice makers are connected to water lines that can crack with age, and it is smart to periodically examine the condition of the water line and connectors to prevent leakage issues. For this reason, some installers will not use poly water lines, insisting only on the use of copper tubing. Proper initial installation and maintenance can save you a panicked call to the plumber, years down the line – your future self will thank you.
See below a step-by-step guide on how to appropriately install a refrigerator water line to avoid future leakage.
Whirlpool’s Guide on How to Install a Refrigerator Water Line
- After unplugging the unit’s power supply, turn off the water supply and allow the remaining water to flush from the line.
- Connect tubing to the water supply. Ensure you have the proper length tubing and insert the end of the tubing into the water supply outlet as far as it will go.
- Flush out the tubing. Place the free end of the tubing into a small bucket or sink and allow the water to flush until the water is clear. Once complete, turn off the water supply and bend the tube to meet the water line inlet.
- Connect the water supply tubing to the refrigerator using a wrench. Install a water supply tube clamp around the water supply line.
- Turn on the water supply. Underneath the sink, locate the water supply valve and rotate it counterclockwise. After checking for leaks at all connection points, push the unit back into place and reconnect its power supply.
Whirlpool’s Additional Tips for Refrigerator Water Line Installation:
- Use copper tubing to prevent off taste and odor in water and ice.
- Tubing should only be installed in areas where temperatures will remain above freezing.
- Flush out several gallons of water to rid the line of any air and residual contaminants.
- Dispose of the first two batches of ice from your ice maker.
Whether it is used for storing our Thanksgiving leftovers or meal preparations for the work week, refrigerators are an essential part of our day to day lives. Installing the refrigerator correctly and maintaining the appliance over the years is the best way to give your refrigerator a long-lasting and leakage-free lifespan.